
Old wallpaper can make your walls look outdated, but removing it the wrong way can cause even bigger problems—like damaged drywall, stubborn glue residue, or uneven surfaces. If you’re planning a home refresh, it’s essential to know how to remove wallpaper safely and effectively.
Here’s a complete step-by-step guide to help you get it done the right way — without calling a professional.
🧰 What You’ll Need
Before you start peeling anything, gather the following tools:
- Putty knife or wallpaper scraper
- Spray bottle or garden sprayer
- Warm water
- Vinegar or wallpaper remover solution
- Sponge or rag
- Drop cloths or plastic sheets
- Painter’s tape
- Optional: wallpaper steamer
👉 Also Read: Detecting Mold in Hidden Areas of Your Home
🧻 How to Safely Remove Wallpaper: Step-by-Step Guide

🧼 Step 1: Prepare the Room
To avoid mess and damage:
- Move furniture away from the walls.
- Cover floors with drop cloths or plastic sheets.
- Use painter’s tape to secure the edges.
- Turn off electricity if you’ll be working near outlets or switches.
Preparation saves you hours of cleanup later!
💦 Step 2: Loosen the Wallpaper Adhesive
Test first: Try peeling a corner of the wallpaper with your putty knife. If it comes off easily, it’s strippable wallpaper—lucky you! Otherwise, you’ll need to soften the adhesive:
Solution mix:
- Fill a spray bottle with warm water and a few tablespoons of vinegar, OR
- Use a commercial wallpaper remover.
Spray generously over a small section of wallpaper and let it soak for 10–15 minutes. This loosens the glue, making removal much easier.
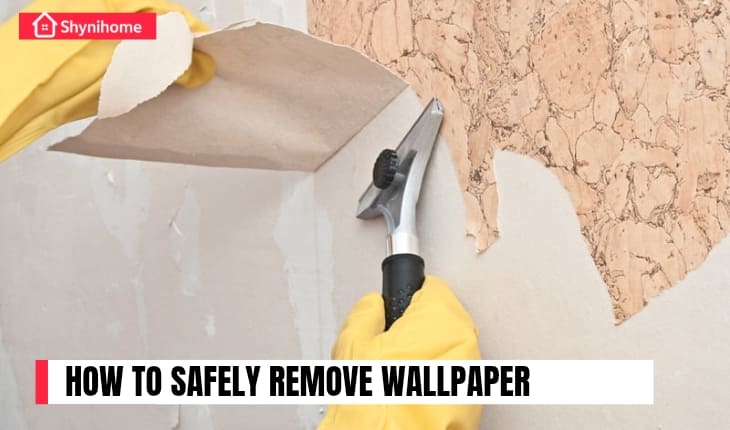
🔨 Step 3: Gently Scrape Off Wallpaper
After the solution has soaked in:
- Start at a seam or edge and use your putty knife to gently lift the paper.
- Pull slowly with your hands while continuing to scrape underneath.
- Don’t rush! Tugging hard may tear the drywall underneath.
For tougher wallpaper, repeat spraying and soaking in sections.
🌫️ Step 4: Use a Steamer (If Needed)
If the wallpaper refuses to budge, a wallpaper steamer can make a huge difference. It uses heat to melt the glue and speed up removal. Be careful not to hold it too long in one spot, or you could damage the wall.
🧽 Step 5: Clean the Walls
Once the paper is removed:
- Use a sponge and warm water to scrub off leftover adhesive.
- Add a few drops of dish soap or vinegar if the glue is stubborn.
- Let the walls dry completely before repainting or re-wallpapering.
⚠️ Common Mistakes to Avoid
- Don’t dry scrape: It damages the wall and leaves glue behind.
- Don’t use boiling water: It can warp or soften drywall.
- Don’t skip testing: Some wallpapers need different methods.
👉 Also Read: Guide to DIY & Home Repair: Fix Your Home Like a Pro
✅ Final Thoughts
Learning how to remove wallpaper without damaging your walls is all about patience, preparation, and the right technique. With just a few simple tools and the steps above, you’ll have clean, smooth walls ready for your next project — whether that’s paint, new wallpaper, or something entirely new.
So take your time, work in small sections, and your walls will thank you!